Supakorn Visutthicho
ตั้งค่า 802.1X Wired Authentication บน Cisco Switch ด้วย Cisco ISE กับ Active Directory
ในบทความนี้เรามาตั้งค่า 802.1X Wired Authentication บน Cisco Switch ด้วย Cisco ISE กับ Active Directory กันครับ
1. ตั้งค่า External Authentication โดยใช้ Active Directory (AD)


ใส่ AD username / password สำหรับ Join Domain


เลือก Group จาก AD ที่ต้องการ เพื่อมาใช้งาน


สร้าง Identity Source Sequence แล้วเลือก AD ที่ add เข้ามาก่อนหน้านี้ เข้ามาใช้งาน


2. สร้าง Network Device Group และ Location ของ อุปกรณ์ Switch ที่จะ add เข้ามาสำหรับ authentication


3. Add Switch เข้ามาใน ISE และตั้งค่า RADIUS


4. ตั้งค่า Downloadable ACL สำหรับอนุญาตให้ไปได้เฉพาะ AD


6. ตั้งค่า Authorization Profile ผูกกับ dACL สำหรับอนุญาตเฉพาะ AD


7. ตั้งค่า Authorization Profile ผูกกับ dACL สำหรับ permit all


8. ตั้งค่า Policy Set สำหรับ Wired Authentication Policy


9. ตั้งค่า Authentication Policy สำหรับ Wired Authentication Policy


9. ตั้งค่า Authentication Policy สำหรับ Wired Authentication Policy


11. ตั้งค่า Authorization Policy สำหรับ User Authentication Policy สำหรับ authen user บน AD และให้ตรวจสอบว่าต้องมี host authen ก่อนถึงจะอนุญาตให้ใช้งานได้


12. ตั้งค่า AAA บน Switch
aaa new-model
dot1x system-auth-control
radius server ISE
address ipv4 10.1.1.200 auth-port 1812 acct-port 1813
key eve1
radius-server attribute 6 on-for-login-auth
radius-server attribute 8 include-in-access-req
radius-server attribute 25 access-request include
radius-server dead-criteria time 30 tries 3
radius-server timeout 2
aaa group server radius ISE-GROUP
server name ISE
ip radius source-interface Vlan10
aaa authentication dot1x default group ISE-GROUP
aaa authorization network default group ISE-GROUP
aaa accounting update periodic 5
aaa accounting dot1x default start-stop group ISE-GROUP
aaa server radius dynamic-author
client 10.1.1.200 server-key eve1
interface Ethernet1/1
switchport access vlan 10
switchport mode access
authentication host-mode multi-auth
authentication port-control auto
mab
dot1x pae authenticator
dot1x timeout tx-period 10
spanning-tree portfast edge
switchport access vlan 10
switchport mode access
authentication host-mode multi-auth
authentication port-control auto
mab
dot1x pae authenticator
dot1x timeout tx-period 10
spanning-tree portfast edge
13. ตรวจสอบการตั้งค่า Wired AutoConfig บนฝั่ง Windows


15. ตั้งค่า Authentication บน Window


16. ตรวจสอบการ Authentication บน Switch
SW#show authentication sessions int e1/0 details
Interface: Ethernet1/0
MAC Address: 5000.0005.0000
IPv6 Address: Unknown
IPv4 Address: 10.1.2.1
User-Name: EVE\supakorn.v
Status: Authorized
Domain: DATA
Oper host mode: multi-auth
Oper control dir: both
Session timeout: N/A
Restart timeout: N/A
Periodic Acct timeout: 300s (local), Remaining: 43s
Session Uptime: 12903s
Common Session ID: 0A0101FD0000000C00020FA6
Acct Session ID: 0x00000003
Handle: 0xB1000001
Current Policy: POLICY_Et1/0
Local Policies:
Service Template: DEFAULT_LINKSEC_POLICY_SHOULD_SECURE (priority 150)
Security Policy: Should Secure
Security Status: Link Unsecure
Server Policies:
ACS ACL: xACSACLx-IP-WIRED_PERMIT_ALL-6313fa09
Method status list:
Method State
dot1x Authc Success
17. ตรวจสอบการ Authentication บน Cisco ISE


Empty space, drag to resize
จบเรียบร้อยคร้าบบบบ หวังว่าจะเป็นประโยชน์นะครับ ติดตรงไหนเม้นสอบถามไว้ได้เลยนะครับ

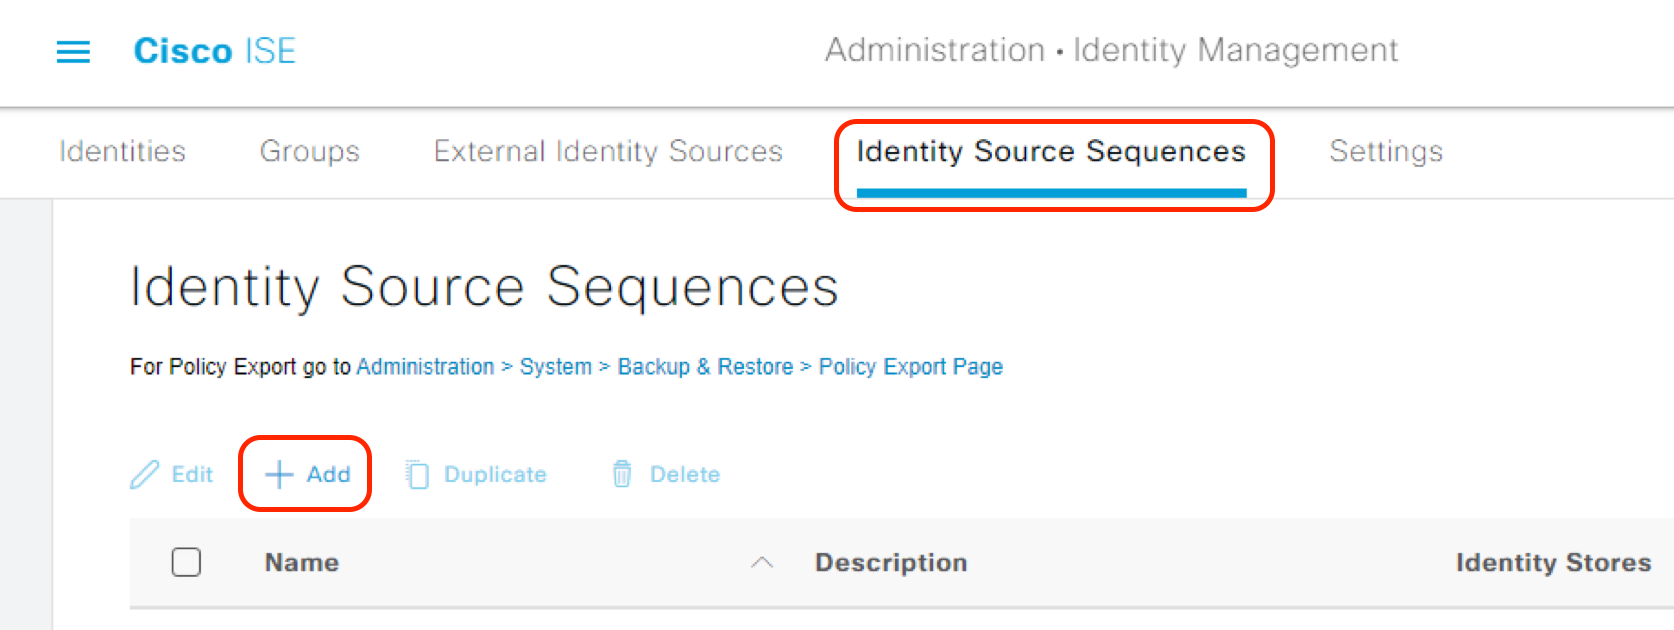
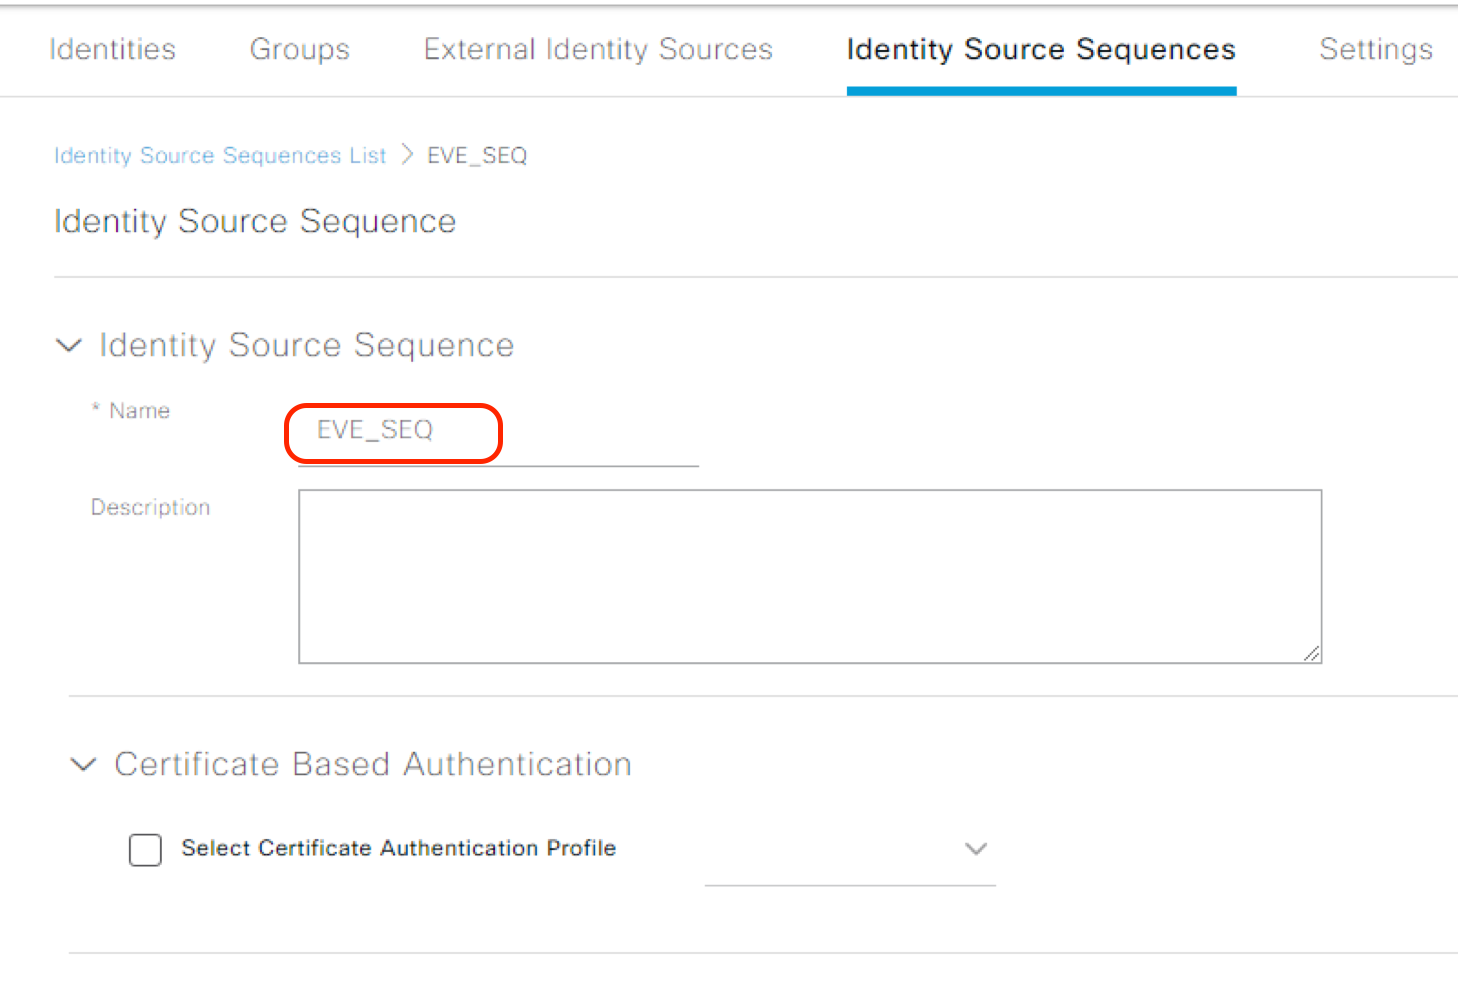
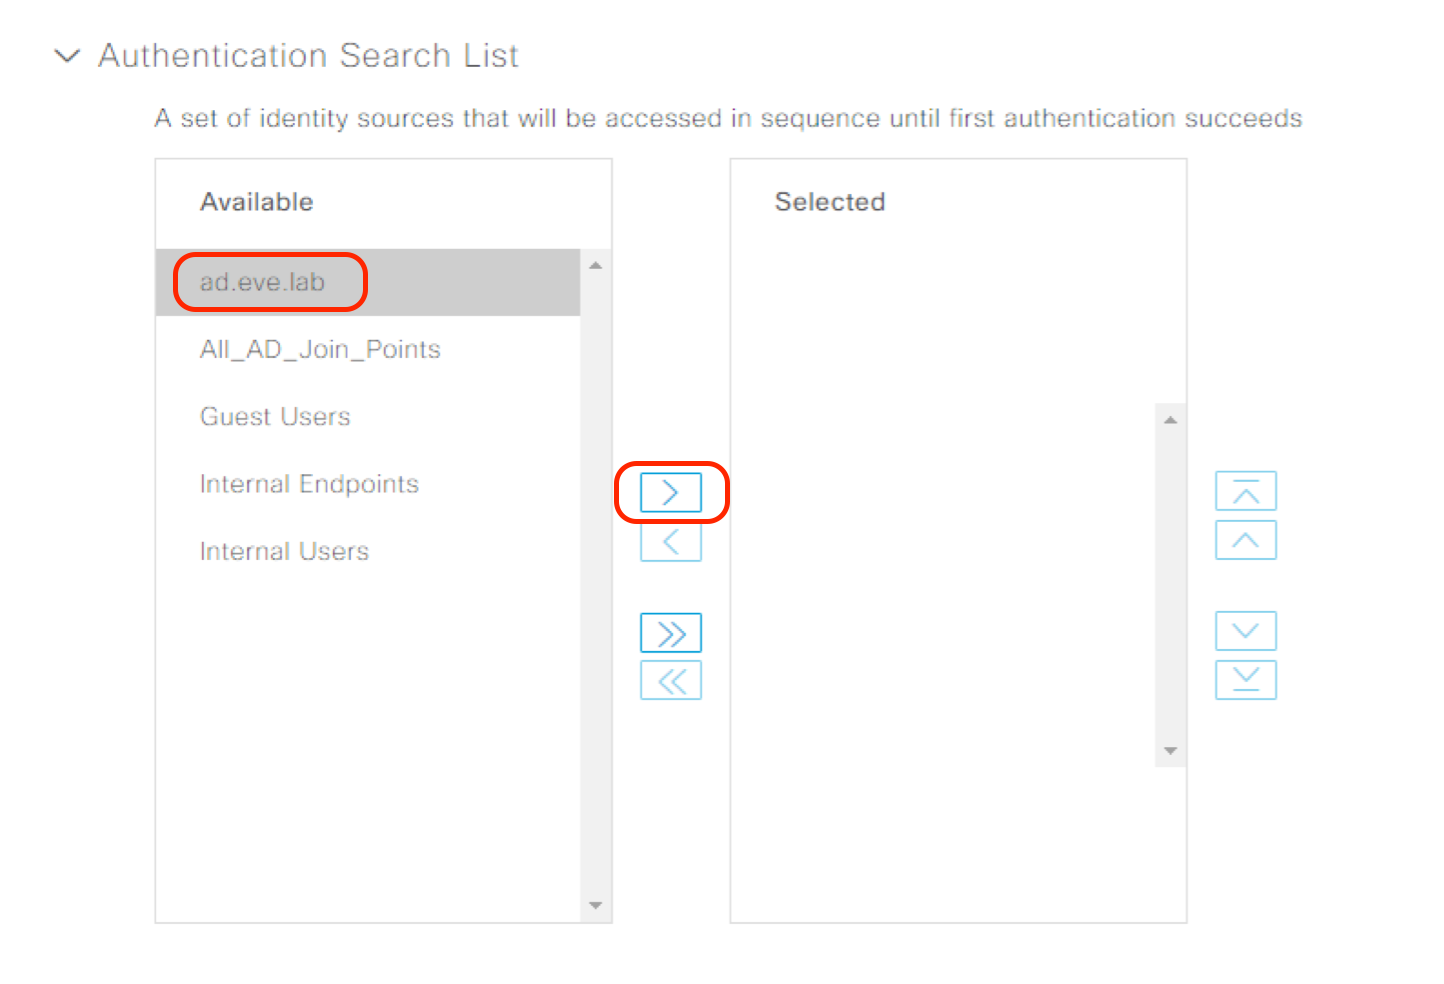
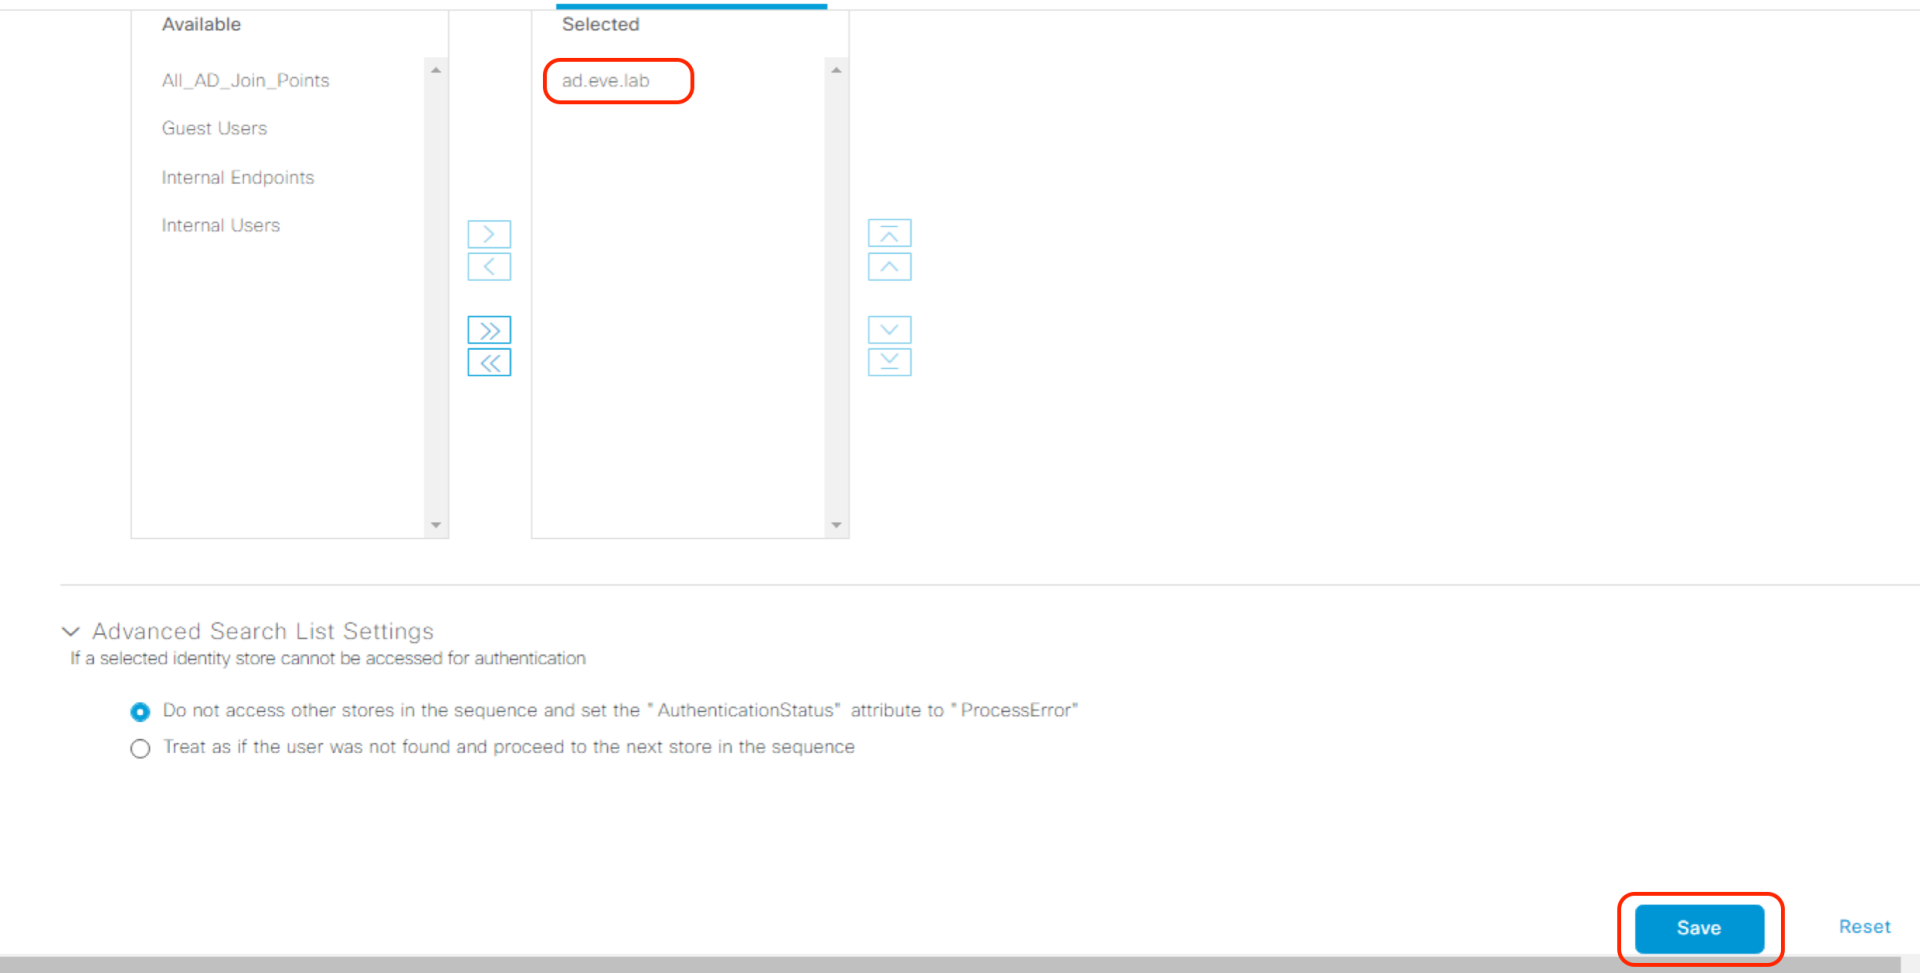
Plantecplus Co.,Ltd (NetPrime Training)
118/28 ถนน พระรามที่ 6 แขวงพญาไท เขตพญาไท กรุงเทพมหานคร 10400
โทร. 098-248-9636, 086-785-3213
อีเมล : netprime@plantecplus.com
118/28 ถนน พระรามที่ 6 แขวงพญาไท เขตพญาไท กรุงเทพมหานคร 10400
โทร. 098-248-9636, 086-785-3213
อีเมล : netprime@plantecplus.com
Blog
Terms
Cookies
Privacy
Copyright © 2022
เว็บไซต์เพิ่งย้ายระบบและทำการปรับปรุง
คอร์สที่เป็น Virtual Classroom และ Classroom ที่มีเอกสารอบรม ยังไม่เรียบร้อยดี กำลังอัพเดทค่ะ